Tutorial - Editing Your Image Gallery
Step By Step
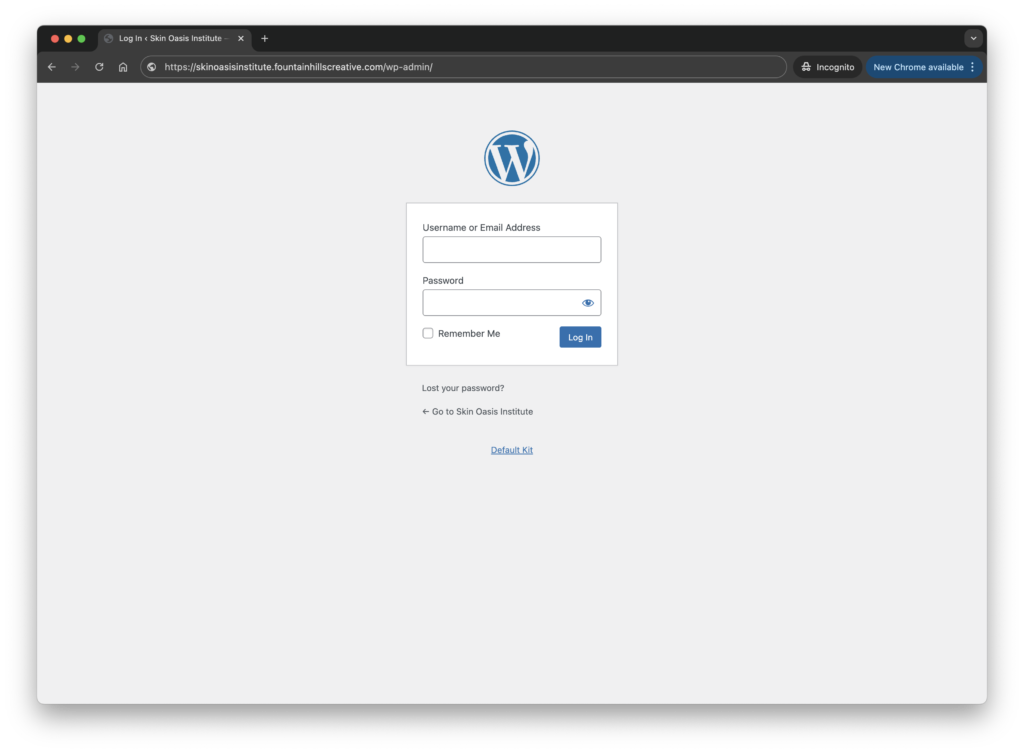
Log Into WordPress
Open browser to https://skinoasisinstitute.fountainhillscreative.com/wp-admin/
Enter your admin username and password to login.
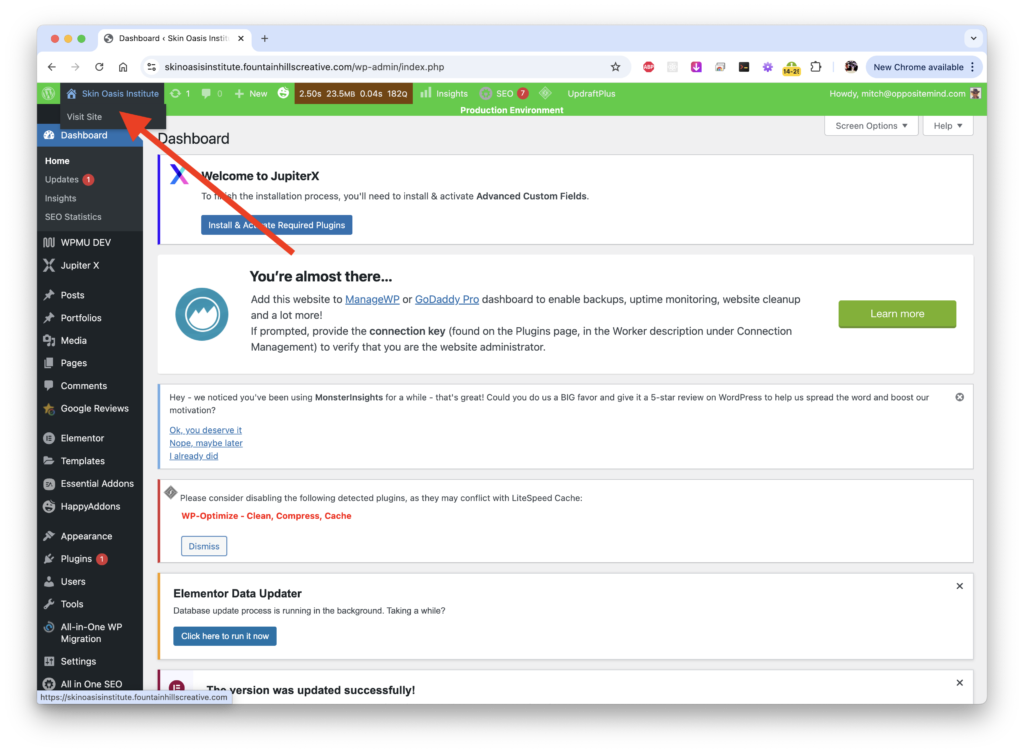
Go Back to Homepage
In the top left corner of your dashboard, click on the name of your website “Skin Oasis Institute” to navigate back to your homepage. Back on the homepage, you will notice there is now a black admin menu across the top of your webpage.
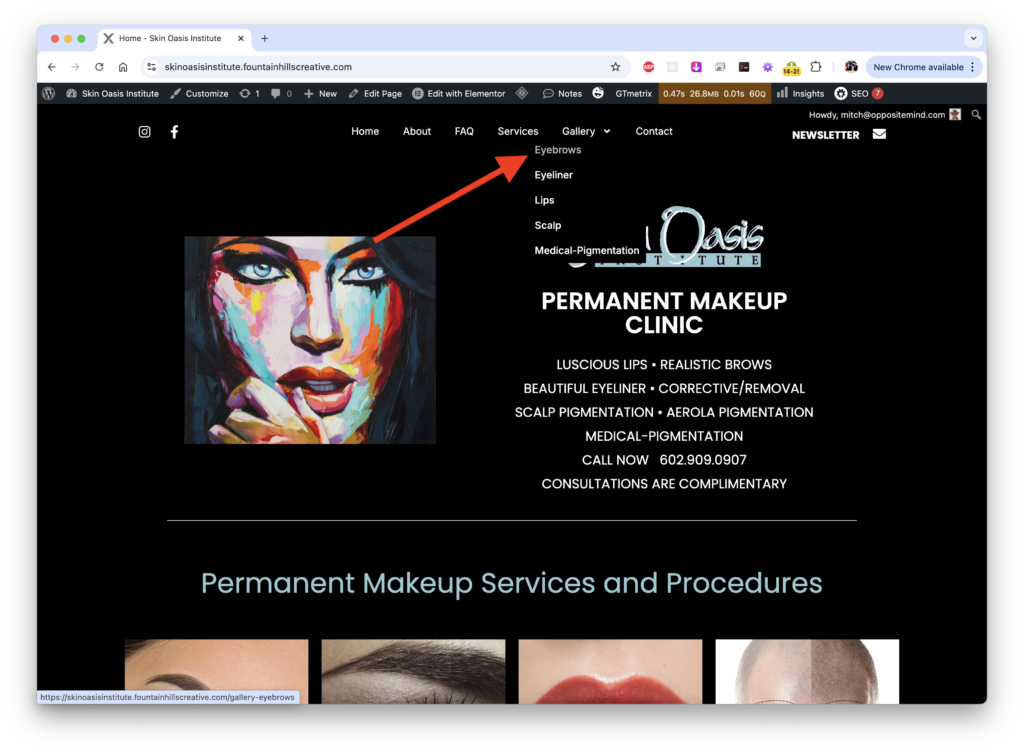
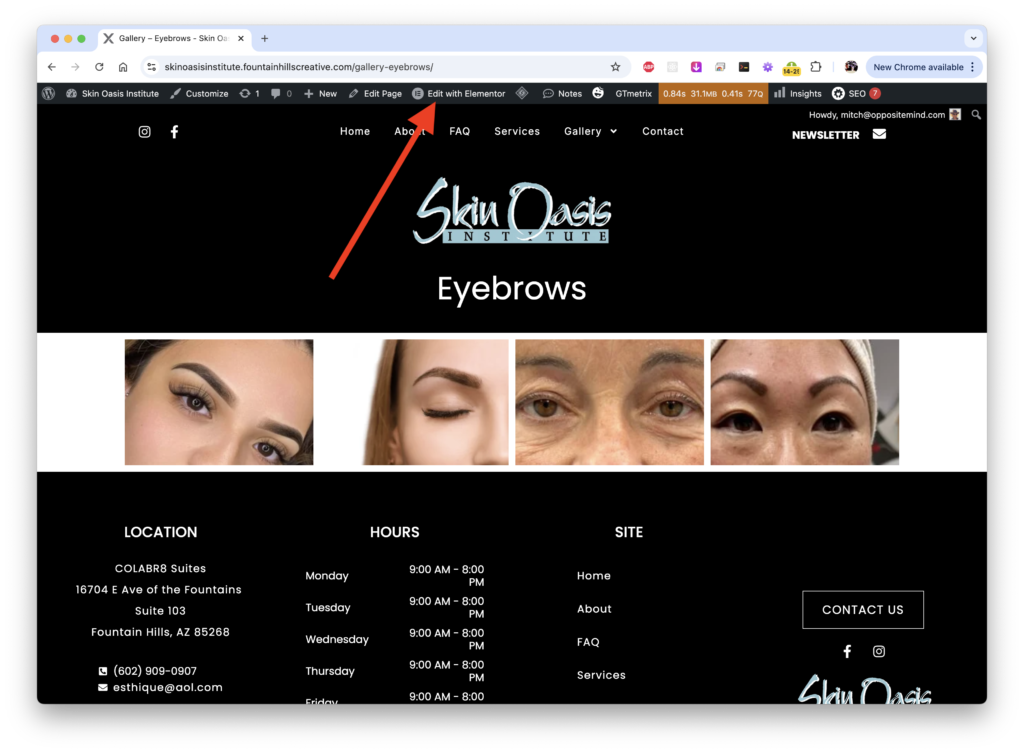
Navigate to Gallery
Navigate to the gallery page you want to edit. In the example below, we are editing the “Eyebrows” page.
Click "Edit with Elementor"
Click the “Edit with Elementor” link on the top navigation to open the gallery page in the website editor. Be careful not to accidentally click or click-and-drag items, as the editor is sensitive.
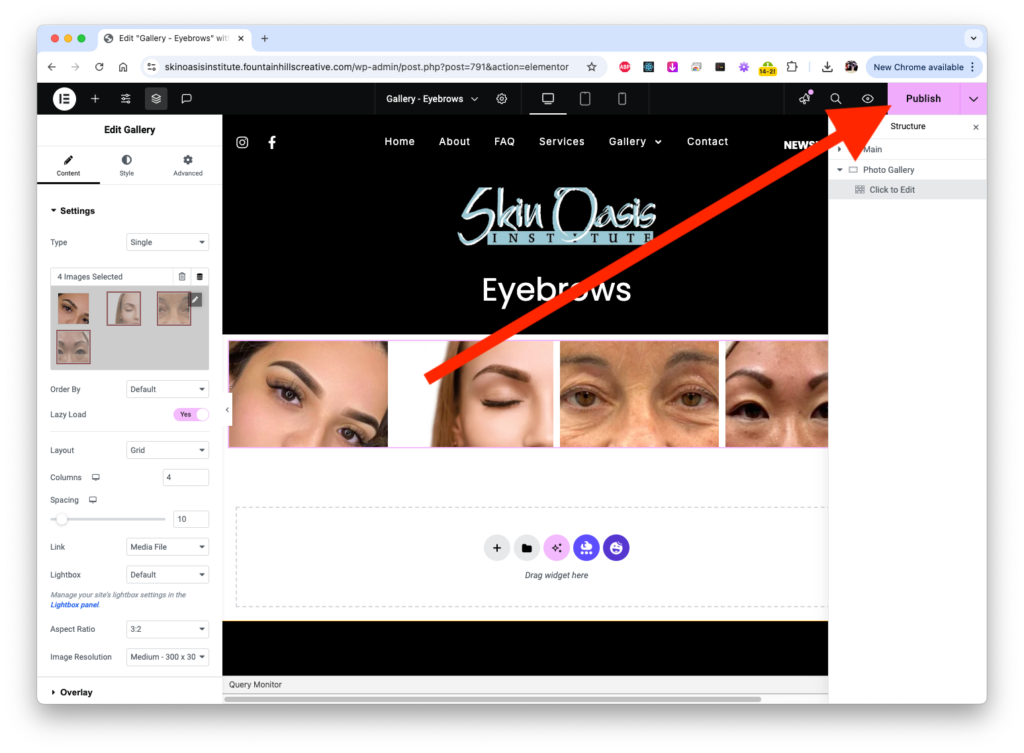
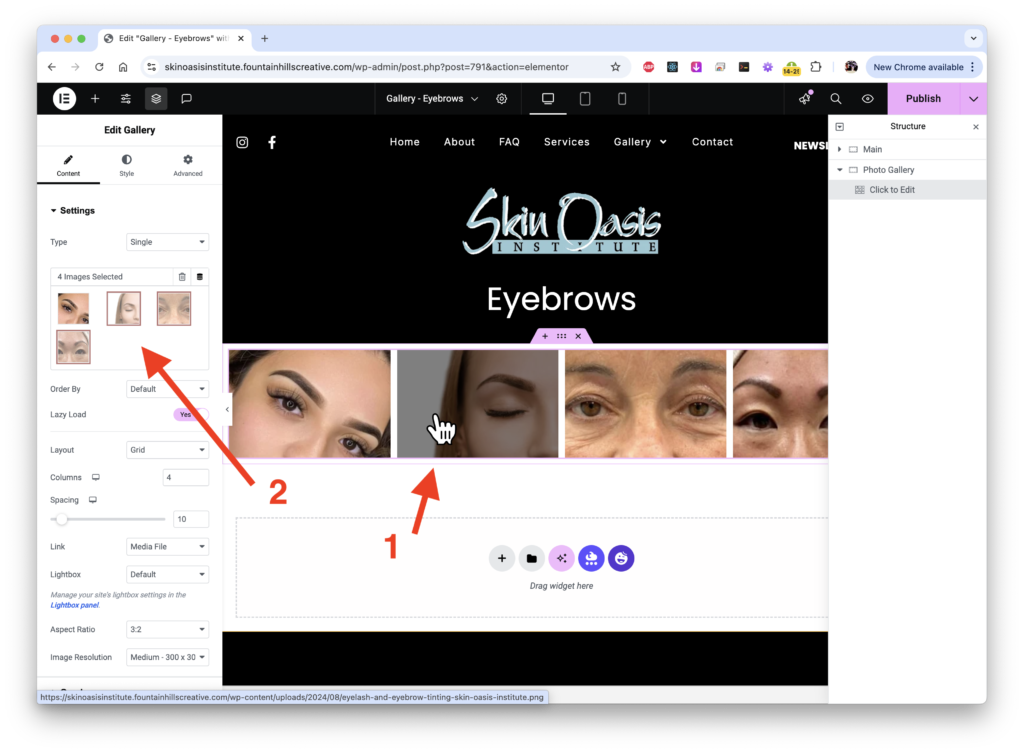
Open Gallery Editor
Click on the gallery on the webpage. After you click on the gallery, an “EDIT” pane will pop on on the left showing all of the thumbnails in the gallery. Click on any thumbnail to open the gallery editor.
Note: Be careful not to click and drag…. only a single click will bring up the editor pane. Even the slightest drag on the trackpad will start moving elements around and rearranging the page.
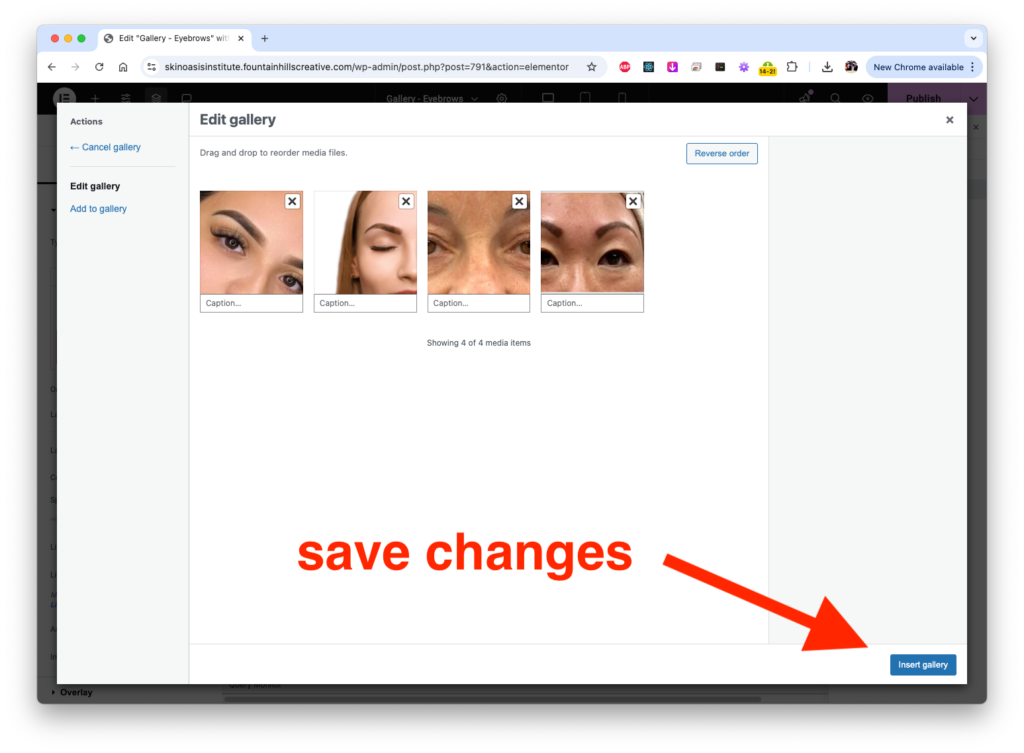
Edit the Gallery
In this edit screen, you can drag new photos in to add them to the gallery. You can also delete images, as well as drag to rearrange the order.
After making the changes, in the bottom right corner, click “Insert gallery” to save changes.
Save Changes
To make your gallery changes live on your website, you must publish them. On the top right of the screen, click the “Publish” button to make all of the changes live.
HAPPY EDITING!